Ceres
Ceres is a one-stop local development application for developers looking to build on top of Zilliqa. It is a simple to use graphical interface that has multiple Zilliqa development tools. Development tools that come with Ceres currently are Isolated server, Devex developer block explorer and Scilla server. Ceres allows developers to run these tools locally on their machine which allows them to: run a local Zilliqa blockchain network, deploy contracts locally, test their contracts using a testing library and view these transactions on a network explorer.
Installation
System Requirements
| MacOS / Linux | Windows |
|---|---|
| NodeJS v12 or newer | NodeJS v12 or newer |
| Docker | Docker |
| WSL 2.0 |
You would also need the following ports to be free on your system:
- Ports 5555, 5556 for Isolated Server
- Port 5557 for Network Explorer
- Port 4000 for Scilla Server
Download Ceres
You can download the Ceres application by clicking on the icon that matches your operating system below.
| MacOS | Windows | Linux |
|---|---|---|
 |
 |
 |
Keep track of Ceres releases on github here.
Available Services
Isolated Server
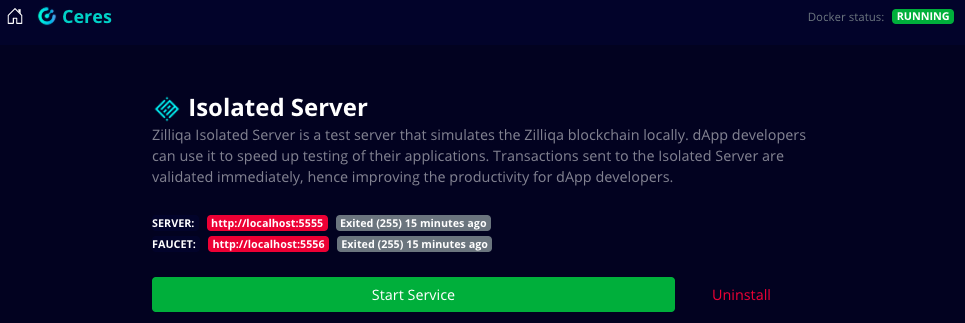
Zilliqa Isolated Server is a test server for dApp developers to quickly test their applications. It allows developers to spin up a simulated blockchain locally where transactions are validated immediately, hence improving the productivity for dApp developers.
Isolated server runs 2 containers that are tied together:
- Server Container (http://localhost:5555) is the local Zilliqa blockchain network and it comes with 10 pre-loaded accounts.
- Faucet Container (http://localhost:5556) is a faucet for the above server, you can query the faucet to get $ZILs to an account.
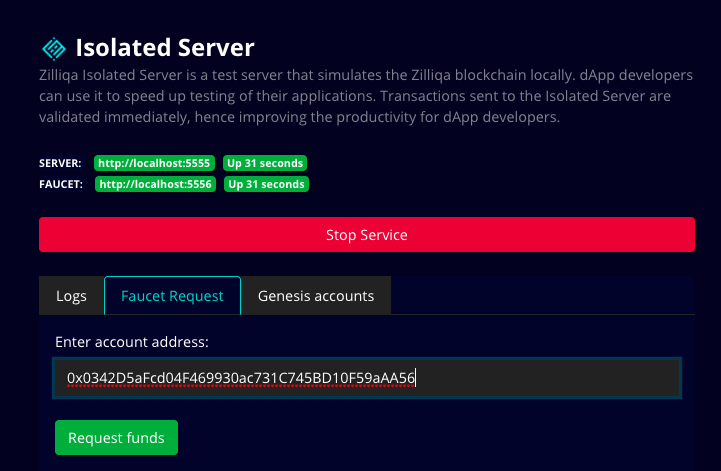
To start the isolated server, you need to click on “Isolated server” from the Ceres’ home screen and then click on “Download and install”. After downloading is finished, you need to click on to Start Service - you have now successfully started the isolated server and faucet.
Using Isolated server during dApp development
To interact with the local blockchain network with your dApp, you would need to set the value of the RPC server URL when initialising a new Zilliqa object to point to the isolated server.
const zilliqa = new Zilliqa('http://localhost:5555'); //Example code in js
Also, you would need to change the Chain ID to reflect the value relevant for the isolated server i.e. 222.
Switching from testing on isolated server to pushing your dApp to production on Zilliqa testnet or mainnet is simple, you just need to change the value of the RPC server URL and Chain ID to the one specific to your network as mentioned here
Devex
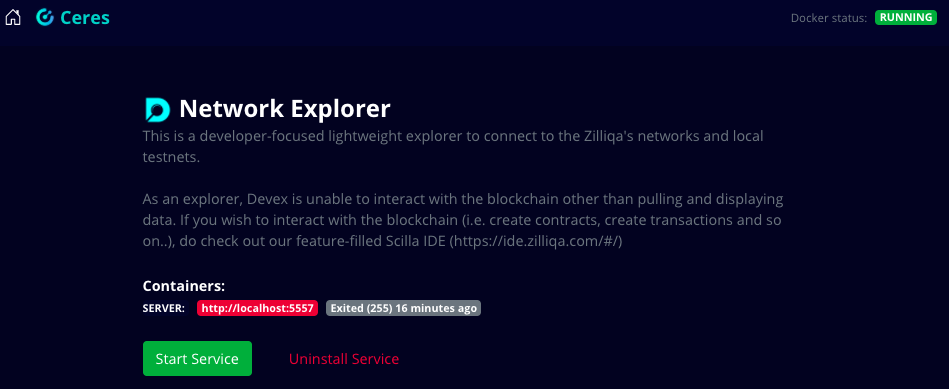
Devex is a developer-focused lightweight blockchain explorer that shows data on the local blockchain network running on the isolated server. Devex runs on the port 5557. You can access it from any browser on http://localhost:5557.
To start the explorer, you need to click on “Network explorer” from the Ceres’ home screen and then click on “Download and install”. After downloading is finished, you need to click on to Start Service - you have now successfully started the network explorer.
Scilla Server
Scilla server runs Scilla binaries locally and exposes API endpoints for
scilla-checker and scilla-runner. The scilla-server provides the
functionality of scilla-runner and scilla-checker as a JSON-RPC server.
Scilla server accepts contract execution requests and executes them, providing a
JSON output within the server process itself.
Scilla Server runs on port 4000. You can call it's API on http://localhost:4000.
To start the server, you need to click on “Scilla” from the Ceres’ home screen and then click on “Download and install”. After downloading is finished, you need to click on to Start Service - you have now successfully started the Scilla server.

Using Ceres with a dApp
After you are done with installation of Ceres and all the available services, you can start using Ceres for your dApp development.
In this section, we will deploy a fungible token (ZRC-2) smart contract using the Zilliqa IDE which would be connected to your local Zilliqa blockchain network. We will also use the local faucet & network explorer in the process. Note : Make sure that you have Isolated server and network explorer services of Ceres running before proceeding further.
Deploying contract on local network
Step 1 : Visit the Scilla IDE, start a new file and write your contract code in it. Alternatively, you can choose one of the already available contracts from the left tab, in this example we will be selecting the Fungible Token contract from the left tab.
Step 2 : Go to the networks tab and click on “Add Network” to add your local blockchain network to the IDE by filling in details of your network.
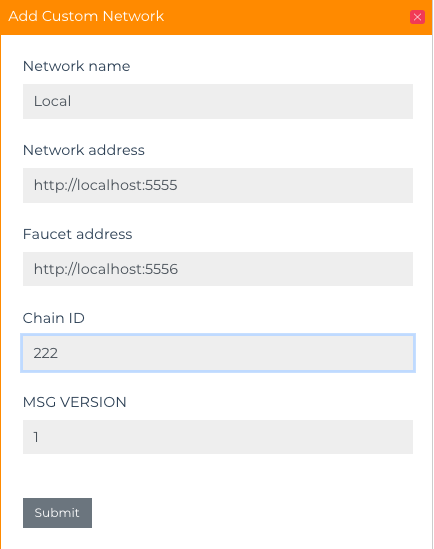
Note
Network ID for the isolated server is 222, referhttps://dev.zilliqa.com/docs/apis/api-blockchain-get-network-id/to know about the id of your Zilliqa network.
Step 3: Select an account that you will eventually use to deploy the contract. In this example, we are using a keystore file but you can use ledger or Zilpay, which is a Zilliqa wallet available as a chrome extension similar to metamask.
Step 4 : Paste your account address and request funds from the faucet available on Ceres.
Step 5: Click on “Deploy”, enter the initialization params and finally deploy the contract!

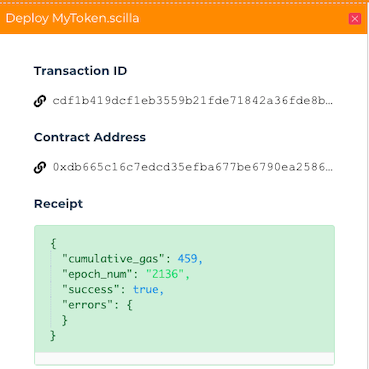
Step 6: You can click on the transaction ID link and you will be redirected to Devex page, alternatively you can also visit http://localhost:5557 (local network explorer) and you will find your contract creation transaction there as well.

Voila! Your contract is now deployed on the local network and can be accessed under the "Contracts" tab on the left side of the IDE.